Sunday, July 15, 2012

Sweet for Freshly Made Sketches

Another sketch challenge for me to play with, and for this one I stepped outside of the box.  I had this package of Doodlebug paper, stickers and embellishments that I decided to pop open to create some cards.  For the sketch, I decided to play around with Freshly Made Sketches #43 (click the link to open in a new window). 

Here is my creation for this challenge.  When I said earlier that I stepped outside of the box, I meant that I did not stamp!  I used stickers to create my front image (I had to stamp the sentiment on the inside, because my stamp addictive behavior just kicked in). 


Supplies:  Cardstock from Bazzill, Pattern Paper from Doodlebug, Stickers from Doodlebug, Sentiment Stamp from My Pink Stamper, Ink from Stampin' Up.

Favorite Color?

Go Fish Challenge #20 was to create a card using your favorite color.  Anytime there is a favorite color challenge, I tend to shy away because I honestly don't have a favorite color.  Is it just me?

I will sometimes go through a blog hop, and I find myself responding to people and saying, "That is one of my favorite colors."  Or in some cases, "color combinations."  After getting to the tenth stop on the hop, I realize that anyone reading my posts would think I'm some kind of freak!  Yes - I'm a freak for colors . . . I love them all!  There are some I don't like at all and would never choose, yet in the right combination, I love! 

So yes, I love all of the colors, and on any given day those combinations are going to shift.  So I tried to think . . . what is a color that I use a lot when creating.  I sit in my pink and green craft room, which used to be my daughter's room . . . and I never changed it because I love it.

So here it is . . . a thank you card in one of my favorite color (combinations) . . .


I used this week's Mojo Monday sketch for this design.  


Supplies Used:  Cardstock from Bazzill; Pattern Paper from Three Bugs, Punch from Stampin' Up, Ink from Stampin' Up, Pearls from KaiserCraft; Stamp from Clear and Simple.

And because I had extra paper to play with, I could not resist my color combination for a second card that turned out super cute.  I'll have to post that one on another day, so stay tuned. 


Friday, July 6, 2012

Treats for the Paws

By golly I'm excited.

While on Pinterest one night, I came across an awesome photo of little homemade ice cream treats for dogs.  It linked me to this awesome site for Bunny Roo Beagle.  Credit where credit is due!

Bunny Roo Beagle, my dogs love you!

So last night with ingredients in hand . . .


I set out to create some fabulous summer treats for my dogs, Samantha, Buzz, Charlie and Lola.  


 Aren't they fabulous!  Well the pups thought they were.  I made mine a little smaller, because I have a small audience.

And I got sixteen paws up . . .


 The picky one even LOVED it (that's Buzz top left).  Charlie barked for more (literally will have to catch the You Tube Video for that scene).  Samantha was her usual sweet stuff.

And Lola, well she stole the show . . . literally.  Show ends as Lola steals the treat.

She's never been much for sharing! 


Wednesday, July 4, 2012

Retro Sketch - My Mind's Eye Series

Another design using the same My Mind's Eye product.  This one is Retro Sketch.  The sketch . . .


I love the sketch.  It leaves a lot of white space, which for me can be a challenge. 

My design . . .


Rather than corner round, I used one of my Corner Chompers (angle cut).  I stuck with the hearts, but used less.  Instead of stitching X's, I did some pen stitching of my hearts and the plaid strip.  I also used a piece of a border sticker above where those X's were.

Supplies:  Bazzill Cardstock, My Mind's Eye Pattern Paper and border sticker (miss caroline), Close To My Heart Black Ink, Fiskars Heart Punch, WeRMemories Corner Comper, The Twinery Twine, My Creative Time Stamp (Bloom Where You Are Planted)

Tuesday, July 3, 2012

So Not My Colors; But They Work!

The real challenges for me are working with color combinations that are just "not me."  Nine times out of ten, I end up likin the colors in the end.  This was one of those times . . .which just proves that the experts who pick these inspiration photos know what they're doing!

Let me preface this by saying that the colors in the photos don't really do them justice.  

The inspiration from The Play Date Cafe . . .


My design . . .


I used an upcoming Mojo Monday sketch for this design.

Supplies:  Bazzill Cardstock, My Mind's Eye Pattern Paper (miss caroline), Stazon Ink Black, Copic Markers, Close To My Heart Color Ready Seam Binding, Unity Stamps June 2012 KOTM and Neopolitan Bisque Soup (Jillibean), Buttons from my stash, Stamping Up Scallop Border Punch.

Friday, June 29, 2012

Mmmm . . . Berry Sweet

My daughter bought some strawberries the other day, and they were so amazing.  I was literally satisfied by inhaling their sweet scent. 

And along comes my Unity Kit of the Month . . . and the challenge sketch . . . and leftover paper from a project and a card is born. 


And my design . . . which I flipped on it's side (because I can) . . .


I used three different stamps from the June Kit of the Month . . . the chevron stripe border which you can barely see on the red cardstock . . . the strawberry "you are so berry sweet" stamp (which I paper pieced using the dot paper) . . . and the strawberry border stamp which I used on the inside. 


On the inside piece I used an aqua painter to color the berries and leaves.  

A very sweet little stamp (pun intended)!  

Supplies Used:  Stampin' Up Cardstock and Designer Series Paper; Stampin' Up Inks; Close to My Heart Ribbon; Fiskars Circle Punch;  Aqua Painter; Unity June Kit of the Month


Sunday, June 24, 2012

Mojo Monday Creation

My scrap stash didn't let me down today!  I had leftover Authentique and Bazzill cardstock from a project that I made a few weeks ago.  When I saw the Mojo Monday sketch, I realized it was perfect for my tiny scraps (which would have soon faced the garbage can).

The sketch . . .


And my design . . .


I really loved the end result, and I love that I didn't have to throw out my tiny little treasured scraps.  


Supplies:  Bazzill Cardstock, Authentique Pattern Paper, Ribbon Scraps from Stash, Beautiful Botanicals Stamp from Stepping Stones, Artichoke Ink from Color Box

Friday, June 22, 2012

Hello Chickadee


For the Card Patterns Sketch this week, I decided to take a few minutes to whip something up with my scrap stash.  I am always creating layouts and then saving my scraps.  I had some scraps left from a recent class I taught . . . some pattern paper and stickers from Authentique.

The sketch . . .


And my design . . .


Nothing fancy, and in some respects . . . it doesn't work, but it does work, but it doesn't work.  I have mixed emotions on this one, as I sometimes do when using up scraps.

Critters on the Farm from Lawn Fawn, coupled with Stamps of Life "Summer4Fun" (the sun).

Use your stash, right?

One interesting note . . . the scallop border is not a border.  It is the top of the heart punched three times and glued together.  Another way to use a regular punch to create a border.

Supplies:  Bazzill Cardstock, Authentique Paper and Stickers, Copic Markers, Stamps from Lawn Fawn and Stamps of Live, Fiskars Heart Punch


Sunday, June 17, 2012

Magical Memories

I was recently charged with creating something decorative for displaying pictures of Disney memories.  It is for an upcoming class at my LSS, New England Scrapbook Co. in Canton, Connecticut.  It is a Disney Sampler Day, meaning that there will be three Disney projects . . . a layout . . . a countdown calendar . . . and a piece of wall art.  

I eventually decided to do a 7 Gypsy Artist Printer Tray for my wall art, which if you've not done before, are SUPER FUN!  I have done a few in the past, most recently was a Girl Scout one to honor a leader in our town who was getting an award.  I've done a Christmas one.  I've done a Family version.  So many possibilities (wedding, baby . . . whatever suits the mood).  But for this one, I went Disney all the way.  I used photo snippets of a trip we took in the 90's when my girls were little.  Such sweet magical memories.

I will admit I stressed over this project . . . getting it just right.  The end result was worth it . . . and hopefully the folks signing up for the class will enjoy putting their memories in the blocks of the tray.

Look at my little cuties . . . 


Some fun things I did within the design of the tray . . . embossing a stamped image in silver on the top left Mickey head . . . that sweet little picture of my girl on the steps of one of the houses in Toon Town . . . my younger daughter almost looking up to her older sister as they ride the carousel) . . . a tiny vial of "magic" with a stamped Mickey that was paper pieced . . . my Jar of Magic (very intense stuff there) . . . and my Mickey hand on an Action Wobble . . . one of our favorite pictures of my youngest hanging on a pole near the castle at the Magic Kingdom, which I put into another Mickey Head to balance out the first . . . and I topped it all up with torn fabric strips.  

The magic on the tray matches the magic of my photos!  I can't wait until this makes it back home and hangs on my wall.

And the best part . . . as I said . . . there are three projects.  The other two designed by others on our team are a layout (here is a snippet of one page - fun, fun, fun page) . . .


And a countdown calendar that can sit on a desk, shelf, etc . . . it has flip pages and the BEST PART . . . put photos on the back side and it doubles as a mini album on your shelf.  When you are not counting down to your next trip you've got photos.  But when a trip is a month away, flip the pages and start your countdown.  How fun for the kids to flip day by day!  A snippet (my bad photo taking skills cut off the number 31) . . .  


Each page is a different color and has a different design . . . all Disney!

Looking forward to the class.  Kits are also available while supplies last . . . so you can call the store if there is interest.  Best part about a kit . . . pieces with no thought, and your done. 

Happy Scrapping!  


Sunday, June 10, 2012

Oh Snap!

One of the newest stamps in my collection . . . Turtles2Love . . . which is the stamp of the month from The Stamps of Life.  I joined this club during a weak moment, and my first two sets were a birthday set which I will feature in another post, and then this one.  When this one originally came, I wasn't sure about it.  But I really love it, and I have some great plans.


The paper is a bit busy . . . I believe it is PB&J from Basic Grey (picked it up at my LSS, New England Scrapbook Co. . . . which is basically where I spent my entire weekend.   I was going for some combinations of greens . . . very turle-ish . . .


I am a paper piecer . . . so I did some cutting and pasting!  


And the sketch is from Mojo Monday.


Supplies:  Bazzill Cardstock, Basic Grey Pattern Paper, The Twinery Twine, Sizzix Border Punch (borrowed from friend - thank you Charlene), Colorbox Ink

Friday, June 8, 2012

Hmmm . . . I See Possibilities

I absolutely adore the way this card turned out (and I really only say that when I mean it).  I struggled with this sketch, but in the end was pleased with the result. 

Card Patterns is the Sketch Challenge . . .


And here is my design . . .


Those two little hearts together on the seat . . . so sweet!  Would be great for anniversary, wedding, or even with a group of hearts for Mother's Day  . . maybe in birthstone colors.  Make it stop.

All product is Stampin' Up except the cardstock base (Bazzill) and the jewels (random from my collection of odds and ends).

I see some possibilities here.  


Sketchbook Saturday Challenge #62

Just a little something for Sketchbook Saturday Challenge . . .

The sketch . . .


My design using some scraps of Stampin' Up Designer Series paper in my stash . . .


A very simple design, although I did some embossing of the border top and bottom.


 Not my usual colors, but a great way to use up pattern paper in my stash and participate in a fun sketch challenge.  All product is Stampin' Up, except for the cardstock base which is Bazzill. 

Cheers!


Tuesday, June 5, 2012

CAS-UAL Fridays - Bling It On

I wanted to make a little something with some BLING for the CAS-UAL Friday challenge. 

And so . . . still with my Imaginisce paper in supply . . . I created something with some BLING in the paper (in the form of glitter) . . . BLING embossed stamp image (in the form of metallic embossing powder) . . . BLING on my crown (in the form of jewels). 


We need a little "askew view" to see the bling.  Can I just say that I love this stamp.  I love a stamp with the word "freakin'" in it . . . probably because I'm known as "Freakin' Debbie" around the scrapbook store.  


But in reality, this stamp reminds me of a different kind of queen . . . Queen Vanna.  I swear it's her voice I hear when I read the front of this card. 

Ode to my Unity Kit of the Month for including this little stamp! 


Supplies:  Bazzill Cardstock, Imaginisce Pattern Paper, Unity Stamp, American Crafts Embossing Powder, Tim Holtz Markers, KaiserCraft Rhinestones, The Twinery Twine, Jolees Rhonestone


Hawaiian Blessing

A little something with my Skipping Stones stamp. 

When I pull pattern paper I like to use it for multiple projects until it is gone. I hate to waste, and I have way more scraps in my stash then I can ever use, so I like to use it all up if I can. So another card with Imaginicse Pattern Paper. The outside . . .


The inside . . .


I love how this turned out. The jewels for the coconuts really make it all pop. Super cute stamp set!

Supplies: Bazzill Cardstock, Imaginisce Pattern Paper, Skipping Stones Design Stamps, Stickles, KaiserCraft Rhinestones

Tuesday, May 29, 2012

Flock O'Chicks

I had started a little design for something . . . and then set it aside as I moved on to something else . . . and then something told me to finish it up.

And so I did create some chicks . . . 


I only inked the parts on the stamp that I wanted to ink (left one chick off and separated the sentiment).  And . . . I used my Tim Holtz markers which are quite awesome.  


Now go glue some stuff yourself! 

Supplies:  Bazzill Cardstock, Imaginisce Pattern Paper, Denami Stamps, American Crafts brads and ribbon, Stampin' Up Ink, Tim Holtz markers, Stickles

Monday, May 28, 2012

Made Me a Fence

At some point along the line, I had been given a basket of goodies from a friend, and the Fiskars picket fence border punch was in there.  I had been wanting to play around with it and decided today was the day.  A shout out to Kelly Jo Massicotte who was at New England Scrapbook one day demonstrating some super cool stuff you could do with punches.  She had the ticket border punch and showed me that you can punch a border and then flip and line up said border to punch "the other side" . . . and that is how I was able to get this adorable little garden border fence using the picket fence punch.  CUTE!   


The flowers are Denami Design stamps that were colored in using my Tim Holtz markers.  I was crazy to cut them . . . CRAZY!  But I do crazy crafting well. 
 

Loving that fence!

And I am usually not a fan of blank space . . . such as in the sky above my flowers.  But I challenged myself to leave it alone (so hard).  

Cheers!

--------------------------------------
Supplies . . . Bazzill Cardstock, Imaginisce Pattern Paper, Fiskars Picket Fence Punch, Stampin' Up Tag Punch and ink for stamping, Denami Designs Stamps - flowers and "Hi!", American Crafts Brads, Tim Holtz Markers

Friday, May 25, 2012

Jar O'Joy

A little photo inspiration from Jay Gee's Nook . . .


I see color.

I see a jar with twine.

I see buttons.

I see . . .


I fell in love with my jar, which I stamped with black Stazon onto a fairly thick sheet of acetate from my LSS, New England Scrapbook Co. in Canton, CT.  It even has a shadow.  After cutting it out, I then stamped the "label" onto white and and affixed it.  I used pop dots behind the jar and label to attach my jar to the paper, and adhered the buttons between the acetate and the paper. 


I definitely want to think about some different ways to fill all the jars I will be making!

Keep on crafting! 

Supplies . . . Bazzill Cardstock, Imaginisce Pattern Paper, Acetate Sheet, Stazon and Stampin' Up Ink, Unity Kit of the Month, American Crafts Ribbon and Brad (in flower), The Twinery Twine, Tag Punch from Stampin' Up, Buttons and flower from my scrap stash. 

Sunday, May 20, 2012

Pretty Pastels Blog Hop - Denami Designs


Hello Hoppers!  I am so excited to be a part of Denami Designs Blog Hop, as I love their stamps, ribbon, etc. 

You should have arrived here from Pat Quinet's blog.  I really enjoyed exploring Pat's blog as I was setting up the links in my post.  She does some beautiful stamping work!  

If you are looking to start at the beginning of the hop, you can click here to get to the Denami Designs Blog where the fun and creativity begins.  It is also a link you can click if you get lost along the way as they have the entire list of links).  

Details on the hop . . . 

When: The blog hop starts on May 20th at 6 AM, PST. However, you have until May 21st, 2012, 11:59 pm PST, to leave comments on all the blogs (to be eligible for a prize).

Why: To be inspired by fun DeNami Design creations and also the chance to win mini shopping sprees on the DeNami Design website!

Prizes: We are giving away THREE $20 gift certificates to our website! We'll be giving away one gift certificate to a random participant (DT members not eligible) and then we'll also be giving away TWO gift certificates to TWO people who comment along the hop!

Pastels!  For my project today, I knew I was going to use two of my favorite denami stamps . . .
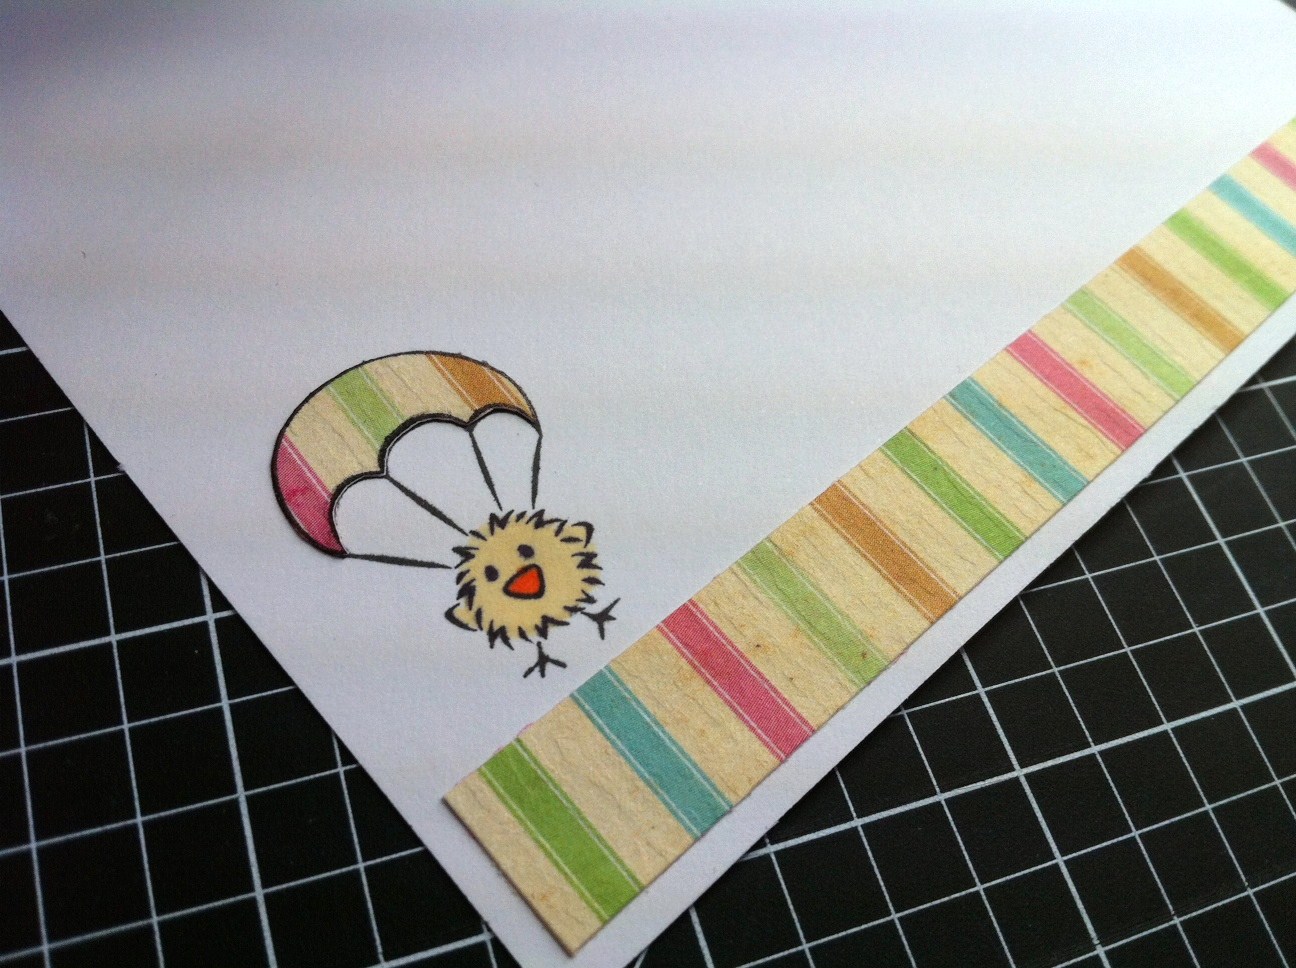
I had a 6 x 6 paper pack of Vintage Marketplace paper from Bazzill that is loaded with some awesome pastels.  I found a nice blue print for the sky and some pink ledger for the greeting.  I went to work making parachutes for my little chick using a pastel stripe.  

Now, I am a huge fan of stamping and paper piecing!  I sometimes let it get out of control.  So I came up with two designs.  One of the designs is less crazy and flat.  I stamped the design onto the blue pattern paper and then paper pieced my parachute and chick.  


My second design is a little more "out of control."  It is one of those where part way into the project you say, "What were you thinking?"  Note that his comment came when I was trying to get my little pieces of twine all lined up at the points of my parachute.  Yes, I replaced the stamped strings with some pastel twine.  Because it is popped, I lost the feet and had to make a decision whether to draw them in, or leave them.  I drew them in.


And on the inside of each card, and little something to tie it all together, but that still gives plenty of room for a handwritten note . . . 


When you leave your comment, let me know which one you prefer.  My vote goes to the flat version. 

Your next stop on the hop is the very creative Tenia Nelson.   I am sure she has something fabulous to inspire you!  
Don't forget to leave your comments to be eligible for the prizes, and I welcome you to become a follower of my blog as well.  Hope you were inspired to put your DeNami Design stamps into action!