Showing posts with label Technique Blog Hop. Show all posts

Friday, November 17, 2017

A Year of Card Techniques November - Masking

Welcome to
Welcome to A Year of Card Techniques Blog Hop where each month we feature a different card technique. We’ve assembled a team of card makers who range from new to advanced, so you’ll see a great variety of cards and ideas.
This month we’re going to explore masking techniques.  There are so many variations of masking, it would be difficult to list them all here.  But, since pictures speak louder than words, we’ll let our team show you the masking techniques they opted to try.  Hopefully, we’ll inspire you to try one yourself.  If you would like to check out our past technique hops, you can do that here:
Our amazing sponsor this month is Jodie Park of Close to My Heart
Please take a moment to check out her store here.
And the awesome prize this month is:

We really appreciate feedback, so please leave a comment on each of the blogs in the hop today.  The winner will be announced on Sunday, November 26, 2017, on A Piece of (my) Heart’s blog, so be sure to check her blog on Sunday. The winner will have until December 14, 2017, to claim their prize.
You should have arrived here from Stampin' Jodie CreationsIf you're visiting here first, you might want to start at the beginning so you don't miss a thing and increase your chances of winning by commenting on
I often start with a confession about the technique.  So here it goes . . . 
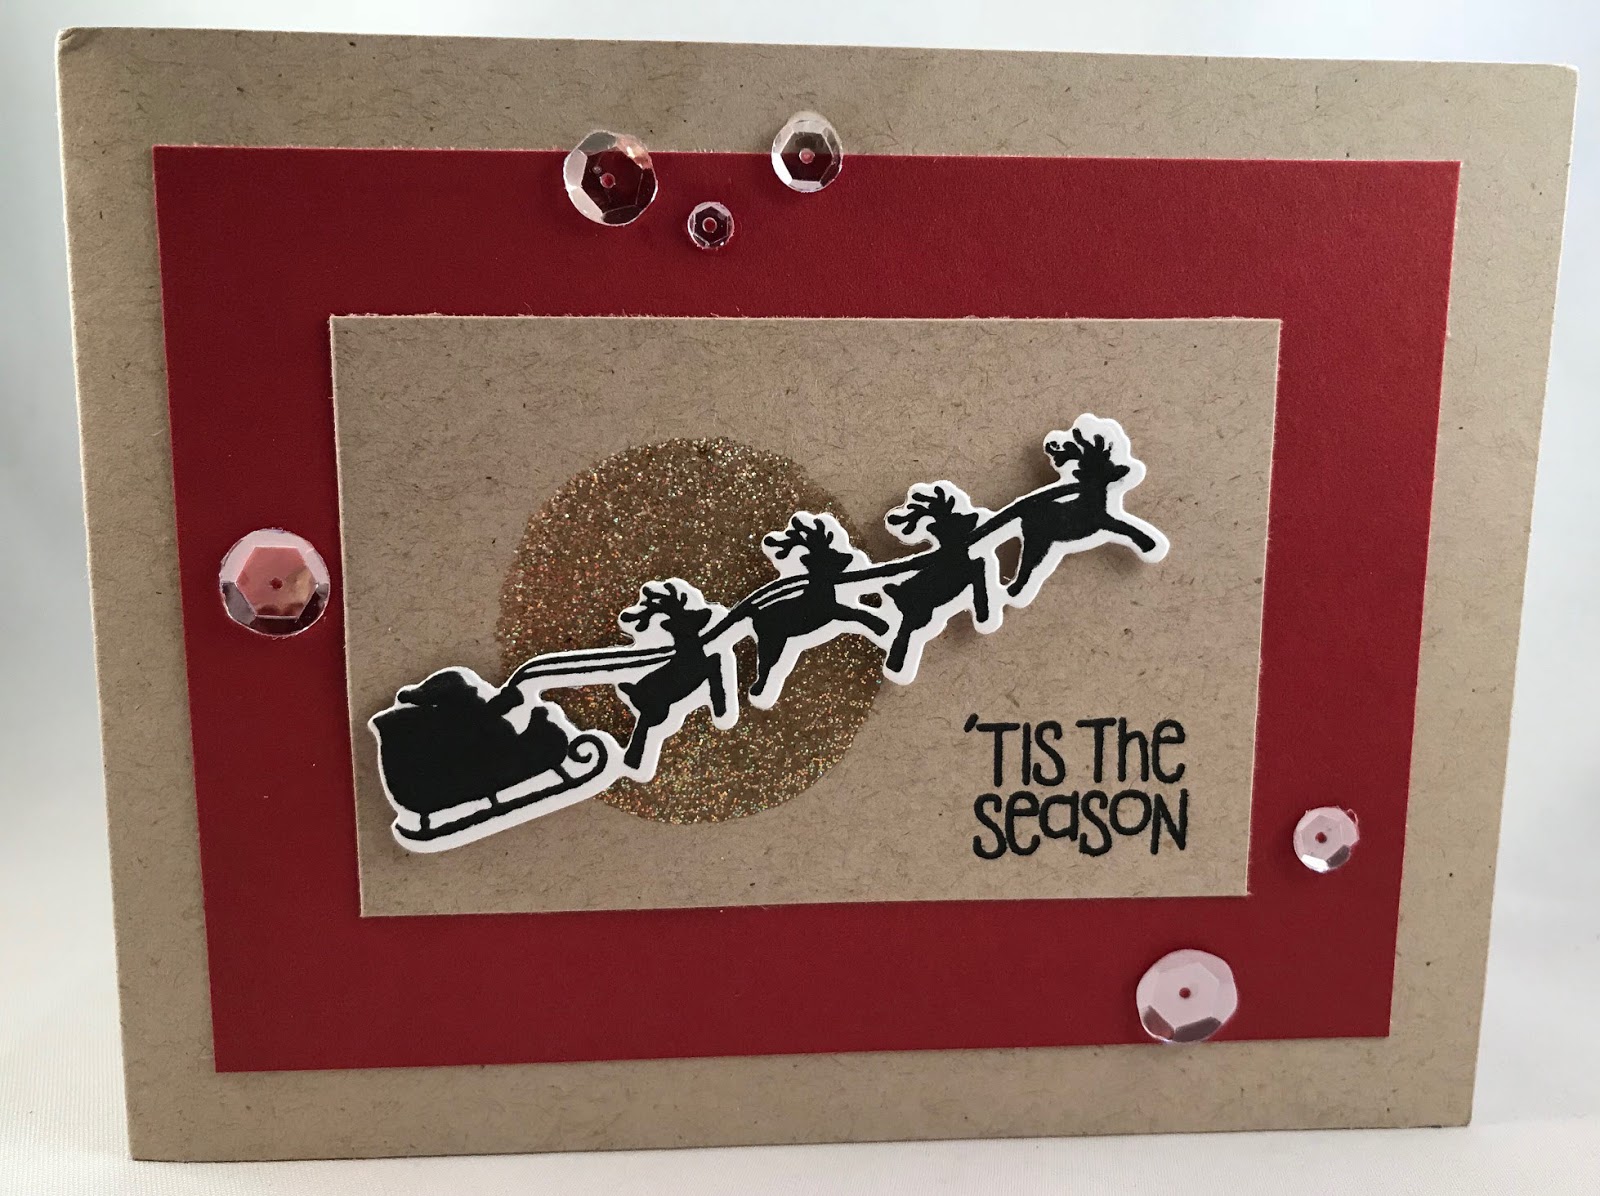
I have had success in the past with masking in detailed ways.  In fact, I will share my favorite masked card ever!  But the ones I created for this blog are a bit more simple.  This first one was a simple masked circle.  I used a circle punch . . . applied Versamark to the mask, and then embossed with an amazing embossing powder.  
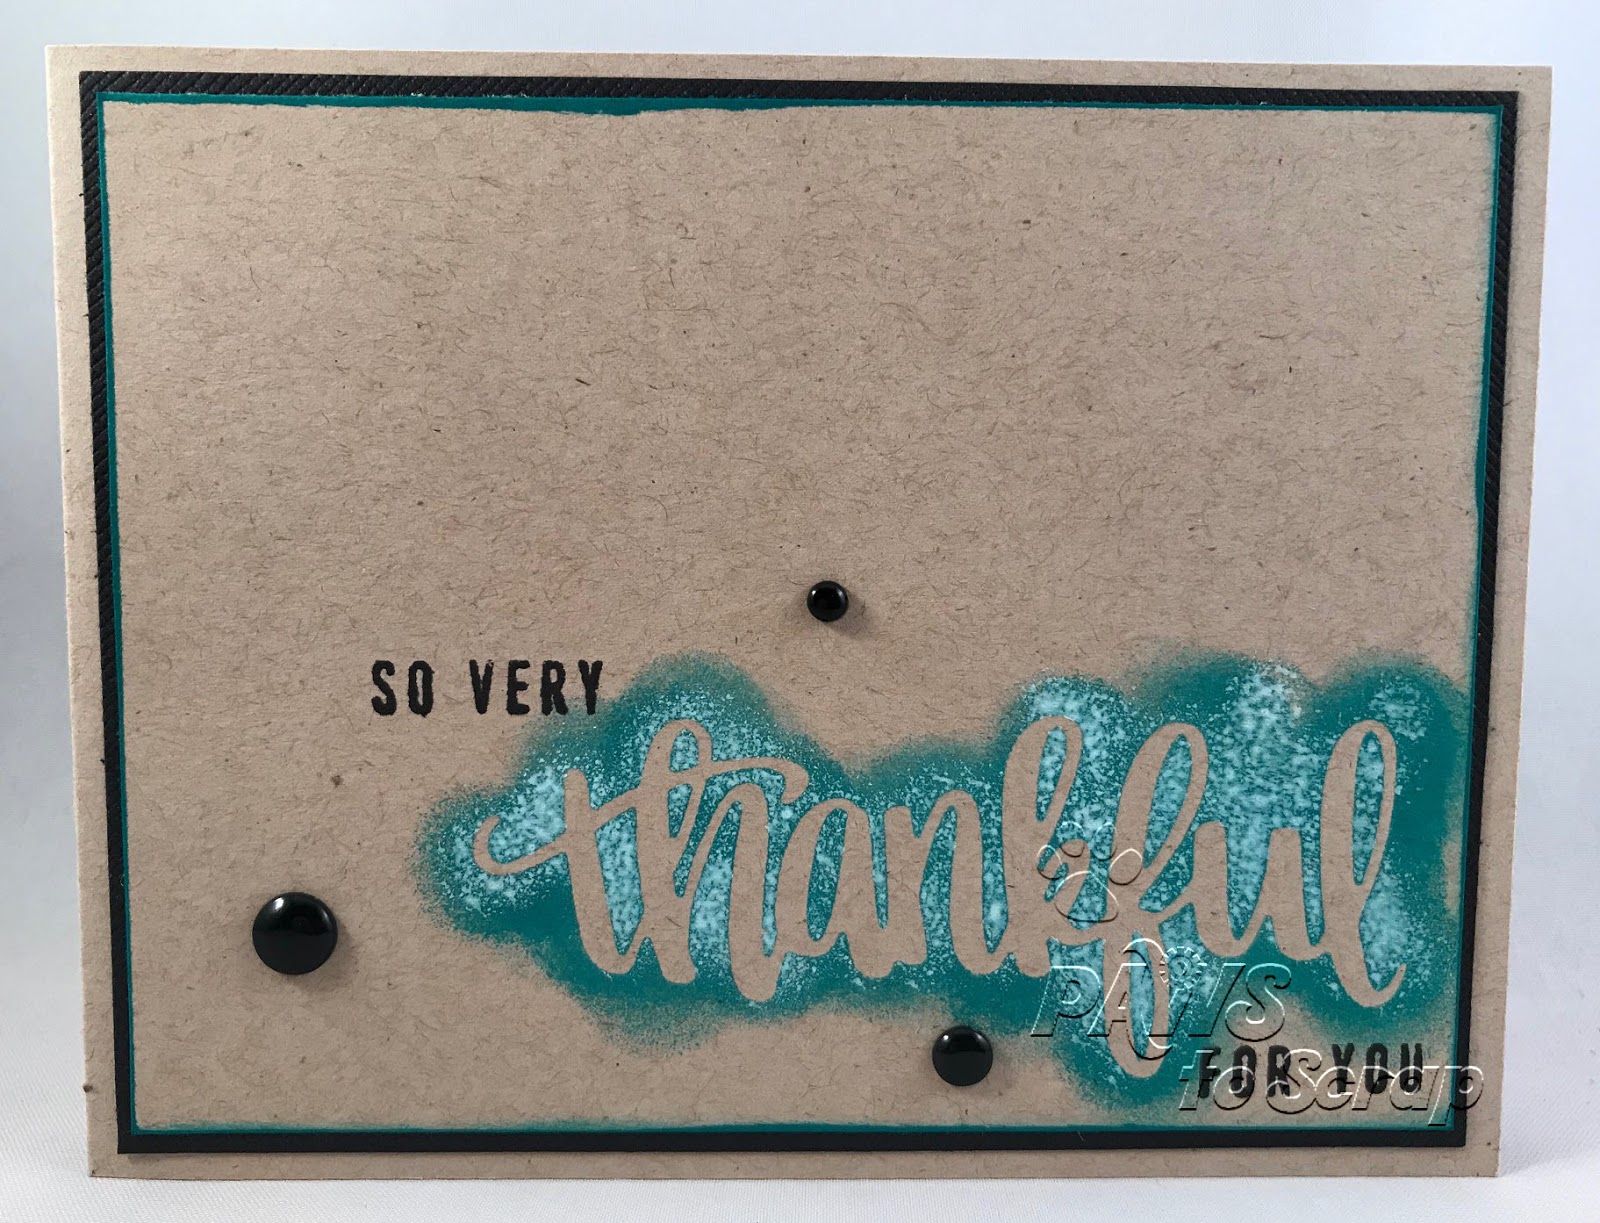
This next card is an example of a masked sentiment.  I'm not sure I'm a fan . . . so I'll get back to you on this one. 

And this last one is an example of direct to paper ink application  The leaf images were masked, and I used an ombre ink pad for the direct to paper. 


And finally, I'll share my favorite masked card EVER!  I made this one several years ago, and a simple masked circle made my day.  But there is a story. 


 I saved it for years and years waiting for the right special person to send it to.  On the day I pulled it to send it, I left the room to get a stamp and came back to find my 4-month old puppy chewing it.  And what does a dog lover do?  They assess whether the recipient is also a dog lover, and then they send an undamaged card and the chewed card, with a note saying, "I saved this card for someone very special, and when I finally had the right opportunity to send, my puppy had other plans.  But I know you are a dog lover, and you will appreciate the teeth marks and missing pieces.  Know that you were that special person and that you were in my thoughts."  

Can I just say . . . big hit.  And gave the grieving person a chuckle.  Be real, that's my advice. 

Now you’re off to visit with Crafting with a View. Hope you had fun and thanks for stopping by.  See you next month with another great technique!
I hope you find some time to create! 
Here’s the full line-up in case you get lost along the way:
Sharon
Kim
Wilma
Amanda
Jodie
Debbie
Claudia


Supplies Used - 'Tis the Season
Stamps and Dies:  'Tis the Season Stamps and Here We Come A-Caroling Stamps and Dies (Catherine Pooler/Stamp of Approval Winterhaven Collection)
Ink & Embossing:  Midnight (Catherine Pooler); Versamark; Wanderlust Embossing Powder (WOW);
Paper: Desert Storm and Solar White Cardstock (Neenah); Ruby Cardstock (Close To My Heart);
Other:  Sparking Clear Sequins (Pretty Pink Posh);

 
Supplies Used - So Very Thankful
Stamps and Dies:  Autumn Blessings Stamps and Thankful Die (Catherine Pooler)
Ink & Embossing:  All That Jazz and Midnight (Catherine Pooler Ink); White Pigment Ink (Simon Says Stamp
Paper: Desert Storm (Neenah); Black Cardstock (Bazzill)
Other:  Enamel Dots (Close To My Heart)

 
Supplies Used - Autumn Blessings
Stamps and Dies:  Autumn Blessings Stamps and Fallen Leave Die (Catherine Pooler Designs);
Ink & Embossing: Butter to Orange Ombre Ink (Hero Arts);  Midnight (Catherine Pooler Ink);
Paper: Solar White (Neenah) Black (Bazzill);
Other:  Enamel Dots (Close To My Heart);


Supplies Used - Thinking of You
Stamps and Dies:  minibanners2cut (The Stamps of Life)
Ink & Embossing:  Dreamweaver Embossing Paste; Variety of Stampin' Up and Ranger Inks; Versamark; Hero Arts White Embossing Powder
Paper:Desert Strom (Neenah); Black (Bazzill)
Other:  Circle Punch; Post-it Labeling Tape; Ribbon (Stampin' Up); Stencil (Add a Little Dazzle)

Friday, October 20, 2017

A Year of Card Techniques October - Waterfall Cards

Welcome to the . . . 
 

. . . where each month we feature a different card technique. We’ve assembled a team of card makers who range from new to advanced, so you’ll see a great variety of cards and ideas.
There’s just something about interactive cards!  And Waterfall Cards are among the best interactive card techniques.  They look intricate, though, so we’ll let you in on any hints we uncover along the way.   Hopefully, we’ll inspire you to try one for yourself.
If you would like to check out our past technique hops, you can do that here:
This month our amazing sponsor is none other than  Bugaboo Stamps
Please take a moment to check out their store here, their blog here and their Facebook page here.
And the awesome prize this month is $12.00 gift code to the store (about four digi images).
We really appreciate feedback, so please leave a comment on each of the blogs in the hop today.  The winner will be announced on Sunday, October 29, 2017, on A Piece of (my) Heart’s blog, so be sure to check her blog on Sunday.  If you would prefer to be notified if you win, please leave your email address in the comments and someone will contact you.  The winner will have until November 16, 2017, to claim their prize.
You should have arrived here from A Card a Day Challenge Team . If you're visiting here first, you might want to start at the beginning so you don't miss a thing and increase your chances of winning by commenting on each blog.

I have three projects for you today, and let me start by saying that I've made lots of interactive cards, but never a Waterfall card.  So this was really fun for me.  My first attempt?  Let's just say there was some mumbling, grumbling, and ripping of paper, followed by some re-stamping, re-cutting, and re-pasting.  Follow this text chain . . . 


I love this stamp set, and while I'm not sure it was perfect for a waterfall card, I had a lot of fun with it.  


I was thrilled with how this turned out!  It worked!  It really worked.  My first tip . . . take your time when adhering and don't miss any steps.  This was all stamping!  All of my emphasis was on the mechanics of the card. 

And then I became an expert and went for my second attempt.  Less grumbling!  One rip up!  No re-stamping, just a little re-gluing.


 This one was stamping and coloring my panels.  But look below . . . do you see my mistake? 


 I'm not sure why, but I thought, "no one will see the back of my colored panels".  WRONG!  When you are gluing them down, you don't see the backs.  As I flipped the card after gluing . . . my heart sank!  UGH!  To rip, or not to rip. I chose to use it as a teachable moment . . . you backsides of those individual panels show when you flip thru that waterfall.  My solution was to put the sentiment pieces on those "colorful" backgrounds.  (I meant to do that . . . NOT). 

And now I'm an expert.  No grumbling and no redoing of anything.  And I had mats around my four waterfall panels, which was a step up.  This one took some time. 


Fun Fact:  These little scenes were all cut from white cardstock, and each house, tree, church, fence and background were inked.  I adore how it turned out. 


My tip on this one . . . don't limit yourself to just stamps.  Have a blast!  The sky is the limit.  

Now you’re off to visit with Amanda. Hope you had fun and thanks for stopping by. See you next month with another technique!

Any, by all means, I hope you find some time to create!  
Here’s the full line-up in case you get lost:
Sharon
Claudia
Wilma
Jearise
Lisa
Jodie
Card A Day Challenge Team
Debbie
Amanda


Supplies Used - Birthday Text Waterfall
Stamps:  Text Ya Later (Stampin' Up)
Ink: Ocean and Green Apple (The Stamps of Life); Tuxedo Black (Memento)
Paper:  Cardstock from Simon Says Stamp; Pattern Paper from my Scrap Stash; Solar White (Neenah)
Accessories:  Sequins (Little Things from Lucy's Cards); Shape Sprinkle Hearts (Doodlebug);


Supplies Used - Halloween Waterfall
Stamps:  How You Bean (Lawn Fawn)
Ink: Tuxedo Black (Memento); Copic Markers
Paper:  Bazzill Cardstock; Solar White (Neenah); Pattern Paper (Studio Calico); Licorice Cardstock (The Stamps of Life);
Accessories:  Ribbon (Stampin' Up); Sequins (Simon Says Stamp)


Supplies Used - Christmas Waterfall
Stamps:  Here We Come A-Caroling (Catherine Pooler Winterhaven Stamp of Approval)
Ink: Icing on the Cake, Rockin' Red, Black Jack, All That Jazz, Lime Ricky, Garden Party (Catherine Pooler Inks); Steel Blue (The Stamps of Life); Tuxedo Black (Neenah);
Paper:  Cardstock (Stampin' Up); Solar White and Desert Storm (Neenah); Pattern Paper (Doodlebug);
Accessories:  Sparkling Clear Sequins (Pretty Pink Posh); Crumb Cake Ribbon (Stampin' Up); Mini Staplier (Close To My Heart)

Friday, September 15, 2017

September Hop: Inlaid & Lifted Die Cut Cards

Welcome to
Welcome to A Year of Card Techniques Blog Hop where each month we feature a different card technique. We’ve assembled a team of card makers who range from new to advanced, so you’ll see a great variety of cards and ideas.
Die Cuts are certainly popular in the crafting world and there are so many from which to choose. But they can be expensive, so we’re looking at additional ways in which we can use them; specifically, inlaid and lifted die cuts.   Hopefully, we’ll inspire you to try an idea or two that we’ve shared with you.
If you would like to check out our past technique hops, you can do that here:   
We have an amazing sponsor this month, Katydid Cards.
Please take a moment to check out the Katydid Cards blog or Facebook page.
And the awesome prize this month is:

We really appreciate feedback, so please leave a comment on each of the blogs in the hop today. The winner will be announced on Sunday, September 24, 2017, on A Piece of (my) Heart’s blog, so be sure to check her blog on Sunday. The winner will have until October 14, 2017, to claim their prize.
You should have arrived here from Jodie's. If you're visiting here first, you might want to start at the beginning to increase your chances of winning by commenting on each blog.  
I have two projects for you today.  One using a sentiment die, and one using a frame die.  So first the sentiment die . . . 

This one uses pattern paper with raised die cut sentiments, and those little smiley faces match the sentiment.  Very simple . . . just cut and pop those sentiments from a pattern paper. 

My second card is stripes of a different fashion.  I used washi tape to create a piece that I later die cut with my frame dies.  Very simple, just use a scrap piece of cardstock, and line up some coordinating washi tape.  When complete, use a set of dies to cut varying sizes . . . and then raise some layers.  I chose to raise the sentiment, and the middle layer.  (But I played with the reverse!)
Love the dimension.  And the gold foil, embossing powder and sequins.  And a great use of washi tape! 

I am the final spot.  Hope you had fun and thanks for stopping by. See you next month with another fabulous technique!
And I hope you find some time to create! 
Here’s the full line-up in case you get lost:
Supplies Used - Smile
Cardstock:  Neenah and Bazzill
Pattern Paper:  Basic Grey
Stamps:  Piece of Me from Lil' Inkers
Dies:  Smile Word Die from Lil' Inkers
Ink:  Memento
Ribbon:  Stampin' Up
Other:  Tiny Attacher Staples and Stampin' Up Circle Punch


Supplies Used - Kindness
Stamps:  Uplifting Thoughts (Simon Says Stamp)
Ink: Versamark
Paper:  Card Base w/Gold Foil; Solar White (Neenah)
Accessories:  Washi Tape from stash; Gold Fine Detail Embossing Powder (Ranger)0; Gold Sequins (Pretty Pink Posh); Deco Labels (Stampin' Up Framelits Die);